This post explains the differences between the DefaultRenderPolicy and the OverlapRenderPolicy and how to use it.
The documentation says the following about render policy:
A render policy is a strategy that MWT uses in order to repaint the entire desktop or to repaint a specific widget. The most naive render policy would be to render the whole hierarchy of the desktop whenever a widget has changed.
Then, it goes on and explain what the DefaultRenderPolicy does:
However DefaultRenderPolicy is smarter than that: it only repaints the widget, and its ancestors if the widget is transparent.
Then, it explains the difference with the OverlapRenderPolicy:
The result is correct only if there is no overlapping widget, in which case OverlapRenderPolicy should be used instead. This policy repaints the widget (or its non-transparent ancestor), then it repaints all the widgets that overlap it.
What it means is that, while the DefaultRenderPolicy only repaints the widget that changed, the OverlapRenderPolicy repaints the widget that changed and all the widgets that overlap it.
But how can this occur? And when is it useful?
Overlapping Widgets
Here is a snippet of code that displays two widgets.
public class Main {

	public static void main(String[] args) {
		MicroUI.start();

		Desktop desktop = new Desktop();

		// Simple style to show the border of the two widgets.
		CascadingStylesheet stylesheet = new CascadingStylesheet();
		EditableStyle style = stylesheet.getDefaultStyle();
		style.setBorder(new RectangularBorder(Colors.RED, 5));
		desktop.setStylesheet(stylesheet);

		// Use a Canvas to overlap two widgets.
		Canvas root = new Canvas();
		Label widget1 = new Label("Widget 1");
		Label widget2 = new Label("Widget 2");

		// Widget 2 is added after Widget 1
		root.addChild(widget1, 0, 0, 100, 50);
		root.addChild(widget2, 50, 0, 100, 50);

		desktop.setWidget(root);
		Display.getDisplay().requestShow(desktop);
	}
}
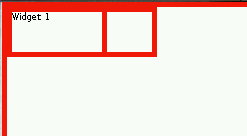
Here is the result:

We use the Canvas container to freely position two widgets. They overlap with each other. Because Widget 2 is added in second, it is displayed on top of Widget 1.
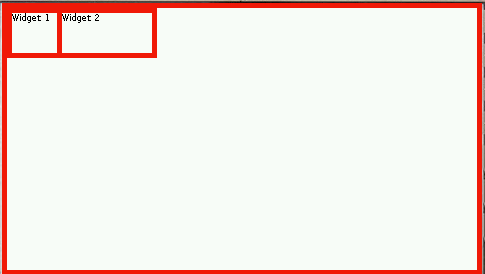
If we add Widget 2 before Widget 1, then the overlap is reversed:
// Widget 1 is added after Widget 2
root.addChild(widget2, 50, 0, 100, 50);
root.addChild(widget1, 0, 0, 100, 50);
So far, we didn’t change the render policy, because it only has effect when we repaint a widget.
Repainting widgets
Next, we add a small loop to repaint each widget in turn.
while (true) {
    try {
        Thread.sleep(1000);
    } catch (InterruptedException e) {
    }
    System.out.println("Render Widget 1");
    widget1.requestRender();

    try {
        Thread.sleep(1000);
    } catch (InterruptedException e) {
    }
    System.out.println("Render Widget 2");
    widget2.requestRender();
}
In this loop, we request each widget to be rendered after a short while.
Usually, we request a new rendering of a widget because it has been updated (e.g. the value displayed changed).
Here is how it looks:
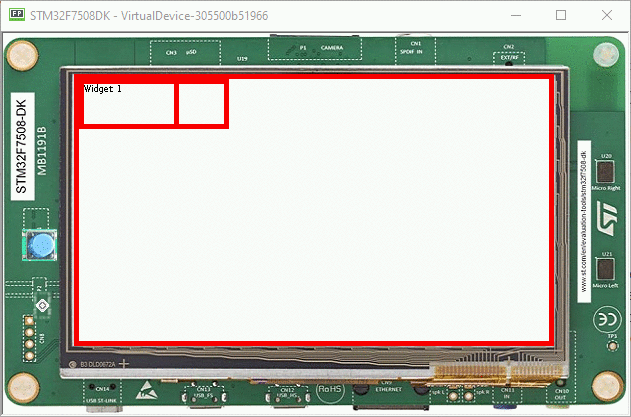
When a widget rendering is requested, the widget is rendered on top of the other widget, regardless of their order in the widget hierachy.
To respect the order of the hierarchy, we can use the OverlapRenderPolicy as follow:
Desktop desktop = new Desktop() {
    @Override
    protected RenderPolicy createRenderPolicy() {
        return new OverlapRenderPolicy(this);
    }
};
In this case, Widget 2 is displayed on top of Widget 1 even when Widget 1 is rendered. The render policy detects that Widget 2 overlaps with Widget 1 and renders it after Widget 1.
Example of Overlap in Demo-Widget
The OverlapRenderPolicy is used in the Demo Widget.
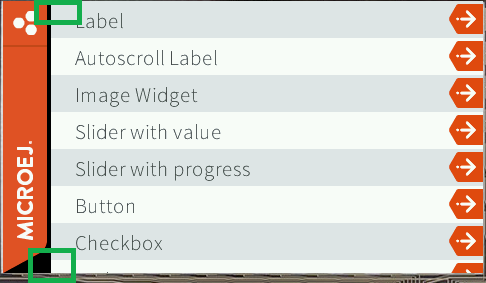
On the main page, the list has round borders on the top left and bottom left corners.
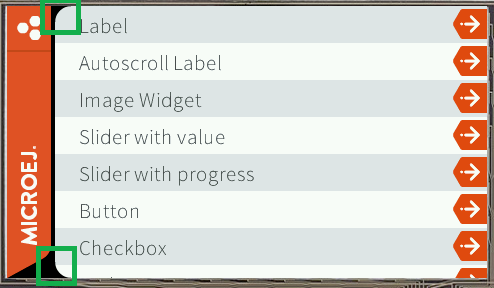
To achieve this rendering, the application uses a custom container and the OverlapRenderPolicy.
The container has 3 widgets:
- the content, that is the list itself (code)
- an image of the top left round corner (code)
- an image of the bottom left round corner (code)
The two images overlap with the content, but because the OverlapRenderPolicy is used, the images are rendered on top of the list even if the list is the only widget repainted explicitely when the user scrolls.
Here is how it looks after we scroll if we switched to the DefaultRenderPolicy:
The corners are rectangular instead of round because the list has been repainted on top of the images.
Conclusion
In summary, we have seen the difference between the DefaultRenderPolicy and the OverlapRenderPolicy.
DefaultRenderPolicyrepaints only the widgets that have been requested to be rendered (withWidget.requestRender())OverlapRenderPolicyrepaints the widgets that have been requested and all the widgets that overlap with them.
The OverlapRenderPolicy can be used to ensure that the order of widgets in the widget hierarchy is respected when widgets are repainted.
Note that the OverlapRenderPolicy is slightly more time-consuming because it must traverse the widget hierarchy to determine which widgets are overlapping with each other.